Blog
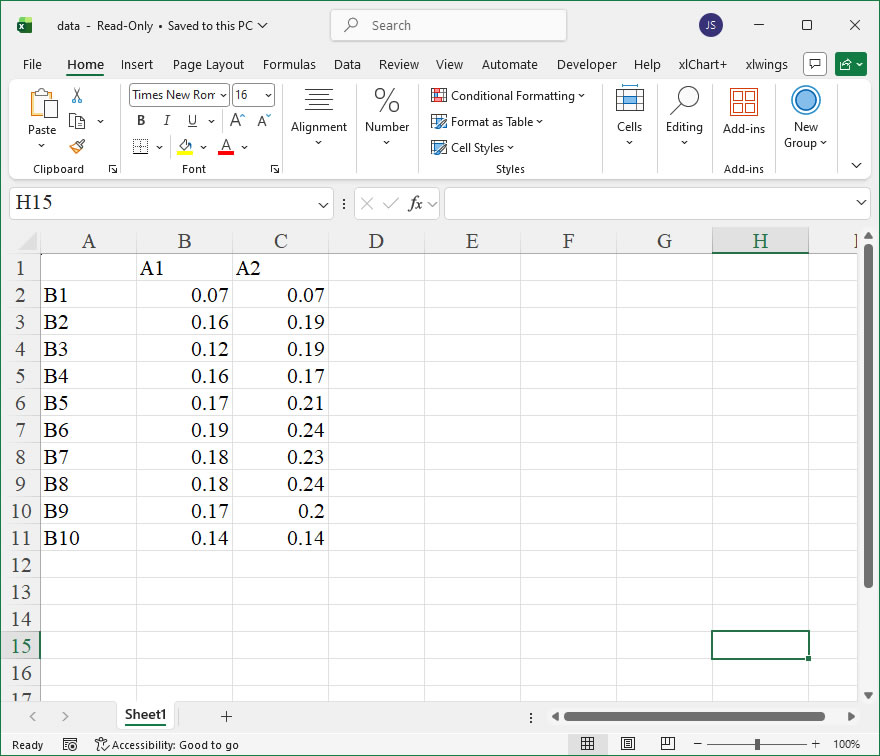
How To Create Clustered Column Chart Using xlwings?
【Example】
【Code】
import xlwings as xw
import os

def set_style(cht):
    cht.ChartArea.Format.Line.Visible=False
    cht.PlotArea.Format.Fill.Visible = False
    cht.PlotArea.Format.Line.Visible = True
    cht.PlotArea.Format.Line.ForeColor.RGB=xw.utils.rgb_to_int((200,200,200))
    #cht.PlotArea.Format.Line.ForeColor.ObjectThemeColor = msoThemeColorText1
    ax1 = cht.Axes(1)
    ax2 = cht.Axes(2)
    ax1.HasTitle = True
    ax1.AxisTitle.Text = 'Categories'
    ax1.AxisTitle.Font.Size = 10
    ax1.TickLabels.Font.Size = 8
    #ax1.TickLabels.NumberFormat = '0.00'
    ax1.HasMajorGridlines = True
    ax2.HasTitle = True
    ax2.AxisTitle.Text = 'Values'
    ax2.AxisTitle.Font.Size = 10
    ax2.TickLabels.Font.Size = 8
    ax2.HasMajorGridlines = True
    cht.HasTitle = True
    #cht.ChartTitle.Caption = 'Plot'
    #cht.ChartTitle.Font.Size = 12

root=os.getcwd()
app=xw.App(visible=True,add_book=False)
wb=app.books.open(root+r'/data.xlsx',read_only=False)
sht=wb.sheets('Sheet1')

sht.api.Range('A2:C7').Select()  #
shp=sht.api.Shapes.AddChart2(-1,xw.constants.ChartType.xlColumnClustered,20,20,350,250,True)
cht=shp.Chart  #

set_style(cht)

cht.Export(root+'/cht.jpg')
cht.Export(root+'/cht.svg')
cht.ExportAsFixedFormat(0,root+'/cht.pdf')

#wb.save()
#app.kill()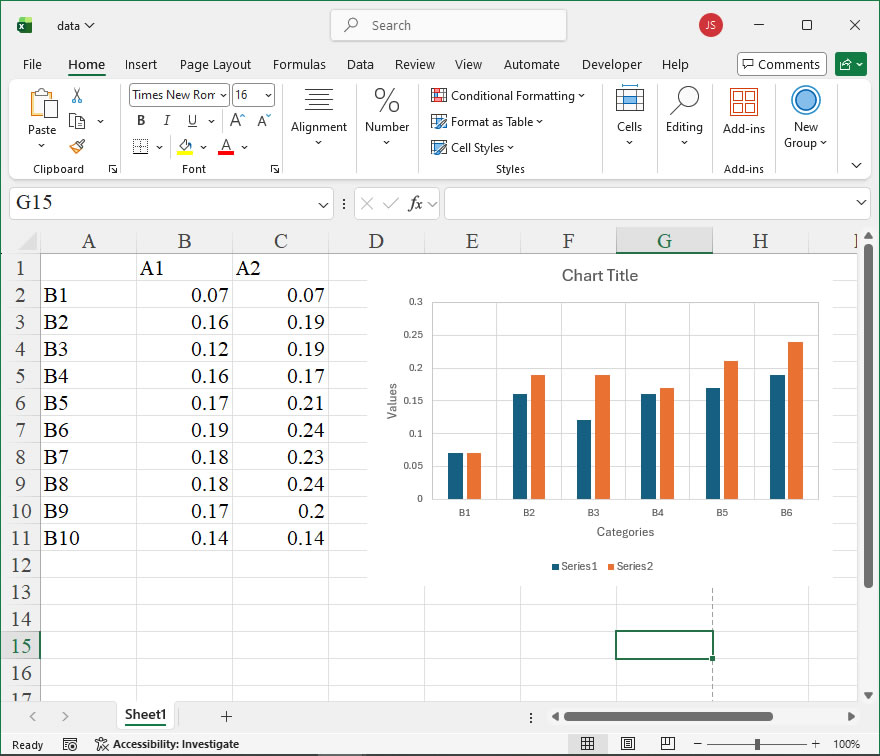
How to use Application.Quit in the xlwings API way
The Application.Quit method in Excel’s object model is a critical command for programmatically closing the Excel application itself. When automating tasks using xlwings, a Python library that interacts with Excel via its COM API, the Quit method provides a clean and controlled way to terminate the Excel process, especially after a script has completed its operations. This is essential for resource management, ensuring that no hidden Excel instances remain running in the background, which could consume memory and system resources. In xlwings, this method is accessed through the App object, which represents the Excel application.
Functionality:
The primary function of Quit is to close the Microsoft Excel application. It is analogous to manually clicking the close button (the “X”) on the Excel window or selecting “Exit” from the File menu. When invoked, it prompts Excel to close all open workbooks. If there are any unsaved changes in any open workbook, Excel will typically display a dialog box asking the user to save, discard changes, or cancel the quit operation, unless this default behavior is overridden by other settings (like DisplayAlerts being set to False).
Syntax in xlwings:
The xlwings API provides a Pythonic way to call this method. The general syntax is:
app.quit()Here, app is an instance of the xlwings.App class, representing a running Excel application. The quit() method does not take any parameters in its xlwings implementation. It’s a direct wrapper around the underlying COM Quit method.
Important Considerations and Parameters:
While the xlwings app.quit() method itself has no arguments, the behavior upon quitting is influenced by the state of Excel’s DisplayAlerts property and the Saved status of workbooks. To quit without being prompted to save, you can set DisplayAlerts to False before calling quit(). However, this will discard any unsaved changes without warning.
| Related Setting | xlwings Access | Effect on Quit |
|---|---|---|
DisplayAlerts | app.display_alerts = False | Suppresses save prompts; unsaved data is lost. |
Workbook Saved Property | wb.saved = True | Marks a workbook as saved, preventing a prompt for that specific book. |
Code Examples:
- Basic Quit: This example starts Excel, creates a new workbook, and then closes the application. If the workbook has not been saved, a prompt will appear.
import xlwings as xw
# Start Excel and create a new workbook
app = xw.App(visible=True)
wb = app.books.add()
# ... perform some operations ...
# Quit Excel (may show save prompt)
app.quit()- Quit Without Save Prompts: This example demonstrates how to force Excel to close immediately, discarding any unsaved changes by turning off alerts.
import xlwings as xw
app = xw.App(visible=True)
wb = app.books.add()
wb.sheets[0].range('A1').value = "Unsaved Data"
# Disable alert dialogs
app.display_alerts = False
# Quit Excel; no prompt will appear, and changes are lost
app.quit()- Quit After Saving: A more controlled approach is to save workbooks explicitly before quitting.
import xlwings as xw
import os
app = xw.App(visible=True)
wb = app.books.add()
wb.sheets[0].range('A1').value = "Important Data"
# Save the workbook to a specific path
file_path = os.path.join(os.getcwd(), 'report.xlsx')
wb.save(file_path)
# Now it's safe to quit without prompts
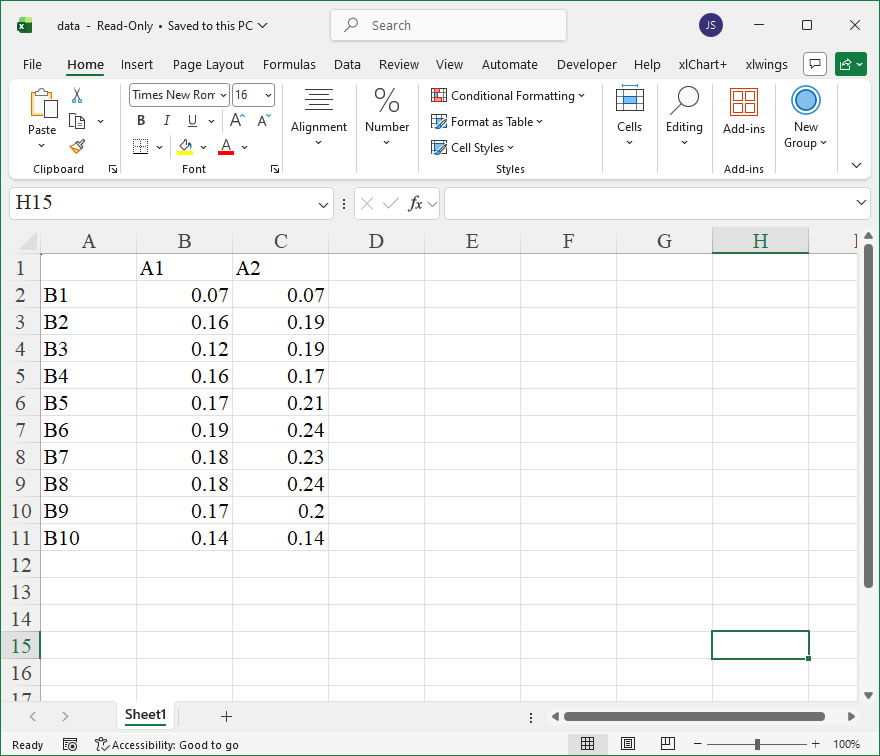
app.quit()How To Create Picture Filled Simple Column Chart Using xlwings?
【Example】
【Code】
import xlwings as xw
import os

def set_style(cht):
    cht.ChartArea.Format.Line.Visible=False
    cht.PlotArea.Format.Fill.Visible = False
    cht.PlotArea.Format.Line.Visible = True
    cht.PlotArea.Format.Line.ForeColor.RGB=xw.utils.rgb_to_int((200,200,200))
    #cht.PlotArea.Format.Line.ForeColor.ObjectThemeColor = msoThemeColorText1
    ax1 = cht.Axes(1)
    ax2 = cht.Axes(2)
    ax1.HasTitle = True
    ax1.AxisTitle.Text = 'Categories'
    ax1.AxisTitle.Font.Size = 10
    ax1.TickLabels.Font.Size = 8
    #ax1.TickLabels.NumberFormat = '0.00'
    ax1.HasMajorGridlines = True
    ax2.HasTitle = True
    ax2.AxisTitle.Text = 'Values'
    ax2.AxisTitle.Font.Size = 10
    ax2.TickLabels.Font.Size = 8
    ax2.HasMajorGridlines = True
    cht.HasTitle = True
    #cht.ChartTitle.Caption = 'Plot'
    #cht.ChartTitle.Font.Size = 12

root=os.getcwd()
app=xw.App(visible=True,add_book=False)
wb=app.books.open(root+r'/data.xlsx',read_only=False)
sht=wb.sheets('Sheet1')

sht.api.Range('A2:B9').Select()  #
shp=sht.api.Shapes.AddChart2(-1,xw.constants.ChartType.xlColumnClustered,20,20,350,250,True)
cht=shp.Chart  #
cht.ChartGroups(1).GapWidth=40
cht.SeriesCollection(1).Format.Fill.UserPicture('D:/pic.jpg')
cht.SeriesCollection(1).Format.Line.ForeColor.RGB=xw.utils.rgb_to_int((0,0,0))

set_style(cht)

cht.Export(root+'/cht.jpg')
cht.Export(root+'/cht.svg')
cht.ExportAsFixedFormat(0,root+'/cht.pdf')

#wb.save()
#app.kill()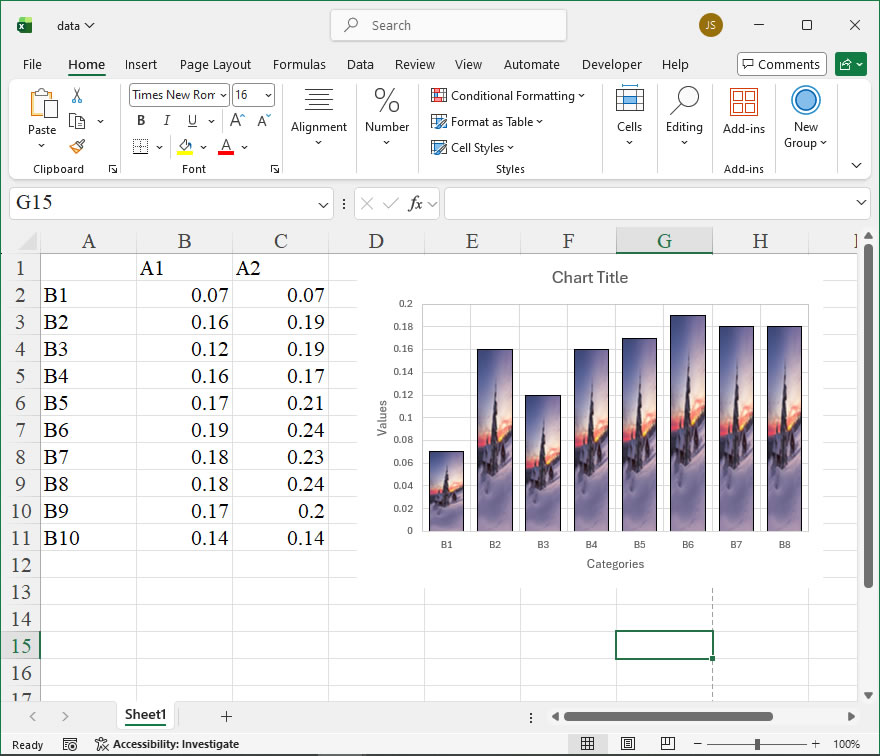
How to use Application.OnUndo in the xlwings API way
The Application.OnUndo method in Excel’s object model is a powerful feature that allows developers to customize the text displayed on the Undo button in the Quick Access Toolbar and specify a macro to run when that Undo command is executed. This is particularly useful for creating custom undo sequences for complex operations that involve multiple steps or external data changes, going beyond Excel’s built-in undo stack. In xlwings, which provides a Pythonic interface to automate Excel, you can access this functionality through the Application object’s api property, which exposes the underlying COM object, enabling you to call VBA-compatible methods directly.
Functionality:
The primary function of OnUndo is to assign a custom undo procedure. When a user clicks the Undo button after your code has set this property, Excel will run the specified macro instead of performing a standard undo. This allows for tailored reversal of actions that might not be captured by Excel’s native undo history, such as modifications to external databases, specific formatting sequences, or multi-sheet operations. It essentially overrides the default undo behavior for the next undo action only.
Syntax in xlwings:
In xlwings, you interact with the OnUndo method via the COM API. The general syntax is:
app.api.OnUndo(Text, Procedure)- Text: A required String argument. This is the text that will appear on the Undo button (e.g., “Undo Custom Import”). It should clearly describe the action to be reversed.
- Procedure: A required String argument. This is the name of the macro (a VBA subroutine) that Excel will execute when the Undo button is clicked. The macro must be stored in a code module of the workbook.
Important Notes on Parameters:
- The
Proceduremust be a macro accessible in the workbook. In an xlwings context, you can write UDFs (User Defined Functions) or macros in VBA modules that are called from Python, but the OnUndo method itself calls VBA code. Therefore, you typically need a VBA macro in place. - The custom undo text remains active only for the next undo operation. After the user clicks Undo or performs another action, Excel reverts to its default undo text and behavior.
- This method does not work for undoing events that occur after the workbook is closed; it is session-specific.
Example Usage with xlwings:
Suppose you have a Python script using xlwings that imports data and performs a complex transformation. You want to provide an undo option that reverts this import. First, ensure you have a VBA macro named UndoCustomImport in a module of your workbook. This macro might clear the imported range or restore original values.
Here is a sample xlwings code snippet:
import xlwings as xw

# Connect to the active Excel instance or create one
app = xw.apps.active

# Connect to the specific workbook
wb = app.books['MyWorkbook.xlsm']

# Run your custom data import and processing code
# ... (e.g., clear a range, write new data from a DataFrame)

# Set the custom Undo text and procedure
app.api.OnUndo("Undo Data Import", "UndoCustomImport")

# Inform the user
print("Data import completed. You can undo this action using 'Undo Data Import' in Excel.")How To Create Pattern Filled Simple Column Chart Using xlwings?
【Example】

【Code】
import xlwings as xw
import os

def set_style(cht):
    cht.ChartArea.Format.Line.Visible=False
    cht.PlotArea.Format.Fill.Visible = False
    cht.PlotArea.Format.Line.Visible = True
    cht.PlotArea.Format.Line.ForeColor.RGB=xw.utils.rgb_to_int((200,200,200))
    #cht.PlotArea.Format.Line.ForeColor.ObjectThemeColor = msoThemeColorText1
    ax1 = cht.Axes(1)
    ax2 = cht.Axes(2)
    ax1.HasTitle = True
    ax1.AxisTitle.Text = 'Categories'
    ax1.AxisTitle.Font.Size = 10
    ax1.TickLabels.Font.Size = 8
    #ax1.TickLabels.NumberFormat = '0.00'
    ax1.HasMajorGridlines = True
    ax2.HasTitle = True
    ax2.AxisTitle.Text = 'Values'
    ax2.AxisTitle.Font.Size = 10
    ax2.TickLabels.Font.Size = 8
    ax2.HasMajorGridlines = True
    cht.HasTitle = True
    #cht.ChartTitle.Caption = 'Plot'
    #cht.ChartTitle.Font.Size = 12

root=os.getcwd()
app=xw.App(visible=True,add_book=False)
wb=app.books.open(root+r'/data.xlsx',read_only=False)
sht=wb.sheets('Sheet1')

sht.api.Range('A2:B9').Select()  #
shp=sht.api.Shapes.AddChart2(-1,xw.constants.ChartType.xlColumnClustered,20,20,350,250,True)
cht=shp.Chart  #
cht.ChartGroups(1).GapWidth=40
cht.SeriesCollection(1).Format.Fill.Patterned(26)
cht.SeriesCollection(1).Format.Line.ForeColor.RGB=xw.utils.rgb_to_int((0,0,0))

set_style(cht)

cht.Export(root+'/cht.jpg')
cht.Export(root+'/cht.svg')
cht.ExportAsFixedFormat(0,root+'/cht.pdf')

#wb.save()
#app.kill()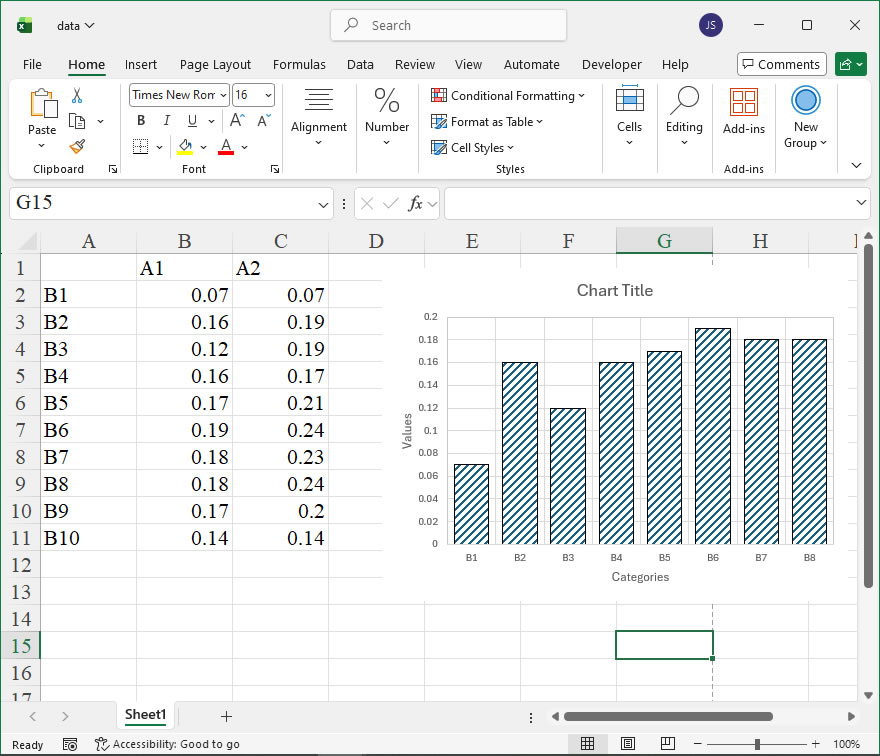
How to use Application.OnTime in the xlwings API way
The OnTime method in Excel’s Application object is a powerful feature for scheduling the execution of a procedure at a specific future time or after a specific time interval. In xlwings, this functionality is accessed through the api property, which provides direct access to the underlying Excel object model. This allows for the automation of repetitive tasks, data refreshes, or timed notifications without user intervention, effectively enabling time-driven macros within a Python-controlled Excel environment.
Functionality:
The primary function is to run a specified VBA macro (procedure) at a predetermined time. It can be used for one-time execution or to set up recurring schedules. While xlwings itself runs Python code, OnTime schedules the execution of VBA macros stored in the Excel workbook. Therefore, typical use involves writing a VBA macro that, when triggered, can call back into Python via xlwings’ RunPython function or perform native Excel operations. This creates a hybrid automation model.
Syntax in xlwings:
The call is made through the Excel Application object. The syntax in xlwings is:
app.api.OnTime(EarliestTime, Procedure, LatestTime, Schedule)- EarliestTime (Required): The time when the procedure should be run. It is a serial Excel date/time value. In practice, it’s often created using
datetimeortimemodules. Example:datetime.datetime.now() + datetime.timedelta(seconds=10). - Procedure (Required): A string specifying the name of the VBA macro to run. This macro must be present in a standard VBA module in the workbook (e.g., “Module1.MyMacro”).
- LatestTime (Optional): The latest time for the procedure to run. If Excel is not in Ready, Copy, Cut, or Find mode at
EarliestTime, it will wait until it enters one of these states, but only untilLatestTime. If omitted, Excel waits indefinitely. - Schedule (Optional): A boolean value.
Trueto schedule a newOnTimeprocedure (default).Falseto clear a previously set procedure that has not yet run.
Code Example:
This example schedules a VBA macro named “RefreshData” to run 5 seconds from now. The VBA macro itself could contain code to call a Python function or refresh queries.
import xlwings as xw
import datetime

# Connect to the active Excel instance or create a new one
app = xw.apps.active

# Calculate the time for execution (5 seconds from now)
run_time = datetime.datetime.now() + datetime.timedelta(seconds=5)

# Schedule the OnTime call. The macro "RefreshData" must exist in the workbook.
app.api.OnTime(EarliestTime=run_time, Procedure="RefreshData")

print(f"Scheduled 'RefreshData' to run at approximately {run_time}")
To cancel a scheduled procedure before it executes, you would call OnTime with the same EarliestTime and Procedure, but set Schedule to False:
# Cancel the previously scheduled "RefreshData" macro
app.api.OnTime(EarliestTime=run_time, Procedure="RefreshData", Schedule=False)How To Create Gradient Filled Simple Column Chart Using xlwings?
【Example】

【Code】
import xlwings as xw
import os

def set_style(cht):
    cht.ChartArea.Format.Line.Visible=False
    cht.PlotArea.Format.Fill.Visible = False
    cht.PlotArea.Format.Line.Visible = True
    cht.PlotArea.Format.Line.ForeColor.RGB=xw.utils.rgb_to_int((200,200,200))
    #cht.PlotArea.Format.Line.ForeColor.ObjectThemeColor = msoThemeColorText1
    ax1 = cht.Axes(1)
    ax2 = cht.Axes(2)
    ax1.HasTitle = True
    ax1.AxisTitle.Text = 'Categories'
    ax1.AxisTitle.Font.Size = 10
    ax1.TickLabels.Font.Size = 8
    #ax1.TickLabels.NumberFormat = '0.00'
    ax1.HasMajorGridlines = True
    ax2.HasTitle = True
    ax2.AxisTitle.Text = 'Values'
    ax2.AxisTitle.Font.Size = 10
    ax2.TickLabels.Font.Size = 8
    ax2.HasMajorGridlines = True
    cht.HasTitle = True
    #cht.ChartTitle.Caption = 'Plot'
    #cht.ChartTitle.Font.Size = 12

root=os.getcwd()
app=xw.App(visible=True,add_book=False)
wb=app.books.open(root+r'/data.xlsx',read_only=False)
sht=wb.sheets('Sheet1')

sht.api.Range('A2:B9').Select()  #
shp=sht.api.Shapes.AddChart2(-1,xw.constants.ChartType.xlColumnClustered,20,20,350,250,True)
cht=shp.Chart  #
cht.ChartGroups(1).GapWidth=50
cht.SeriesCollection(1).Format.Fill.ForeColor.RGB=xw.utils.rgb_to_int((0,0,255))
cht.SeriesCollection(1).Format.Fill.OneColorGradient(1,1,1)    #msoGradientHorizontal
cht.SeriesCollection(1).Format.Line.ForeColor.RGB=xw.utils.rgb_to_int((0,0,0))

set_style(cht)

cht.Export(root+'/cht.jpg')
cht.Export(root+'/cht.svg')
cht.ExportAsFixedFormat(0,root+'/cht.pdf')

#wb.save()
#app.kill()
How to use Application.OnRepeat in the xlwings API way
The Application.OnRepeat property in Excel VBA is used to assign a macro name (as a string) that will be executed when a user clicks the “Repeat” command. This command is typically available after performing an action that can be repeated, such as via the toolbar or the shortcut Ctrl+Y. In the context of xlwings, which provides a programmatic bridge between Python and Excel’s object model, this property can be accessed and manipulated to automate repetitive tasks within an Excel session. However, it’s important to note that xlwings primarily interacts with Excel through its API, and while it can execute VBA code, directly setting the OnRepeat property is not a standard, out-of-the-box feature because it is deeply tied to the VBA environment and the user interface. Typically, xlwings focuses on data manipulation, analysis, and automation using Python, leaving UI-specific commands like OnRepeat to be handled within VBA if necessary.
Functionally, OnRepeat allows for the customization of what action is repeated, enabling developers to define a specific macro for repetition, which can enhance user efficiency. In xlwings, to work with this property, you would need to use the api property of an xlwings App or Book object to access the underlying Excel Application object from the COM interface. This gives you direct access to VBA properties and methods, including OnRepeat.
The syntax for accessing the OnRepeat property via xlwings is through the Application object’s COM interface. Here’s the general format:
import xlwings as xw

# Connect to the active Excel instance or create a new one
app = xw.apps.active

# Access the OnRepeat property
repeat_macro = app.api.OnRepeat # Get the current value
app.api.OnRepeat = "MacroName" # Set the value to a macro name- app: This is an xlwings App object representing the Excel application.
- api: This property provides access to the pywin32 COM object, which mirrors the Excel Application object from the VBA object model.
- OnRepeat: This property can be get or set. When getting, it returns a string representing the name of the macro assigned to the Repeat command. When setting, it assigns a macro name (as a string) to the Repeat command. The macro must exist in the workbook’s VBA project.
- MacroName: A string specifying the name of the macro to be repeated. This macro should be defined in a VBA module within the workbook.
Note: The OnRepeat property is specific to the Excel Application session and may not persist after closing Excel. Also, it requires that macros are enabled in Excel, and the macro must be accessible (e.g., in a standard module).
Here is an example code instance using xlwings to set and use the OnRepeat property:
import xlwings as xw

# Assume Excel is open with a workbook containing a macro named 'RepeatFormatting'
wb = xw.books.active
app = wb.app

# Set the OnRepeat property to 'RepeatFormatting'
app.api.OnRepeat = "RepeatFormatting"

# To demonstrate, we can run the macro once via xlwings (if needed)
# First, ensure the macro is in a module. We can run it using the Run method:
app.api.Run("RepeatFormatting")

# Later, when the user clicks Repeat or presses Ctrl+Y, the 'RepeatFormatting' macro will execute again.

# To retrieve the current OnRepeat setting:
current_repeat = app.api.OnRepeat
print(f"The current Repeat macro is: {current_repeat}")

# To clear the OnRepeat property (set it to an empty string):
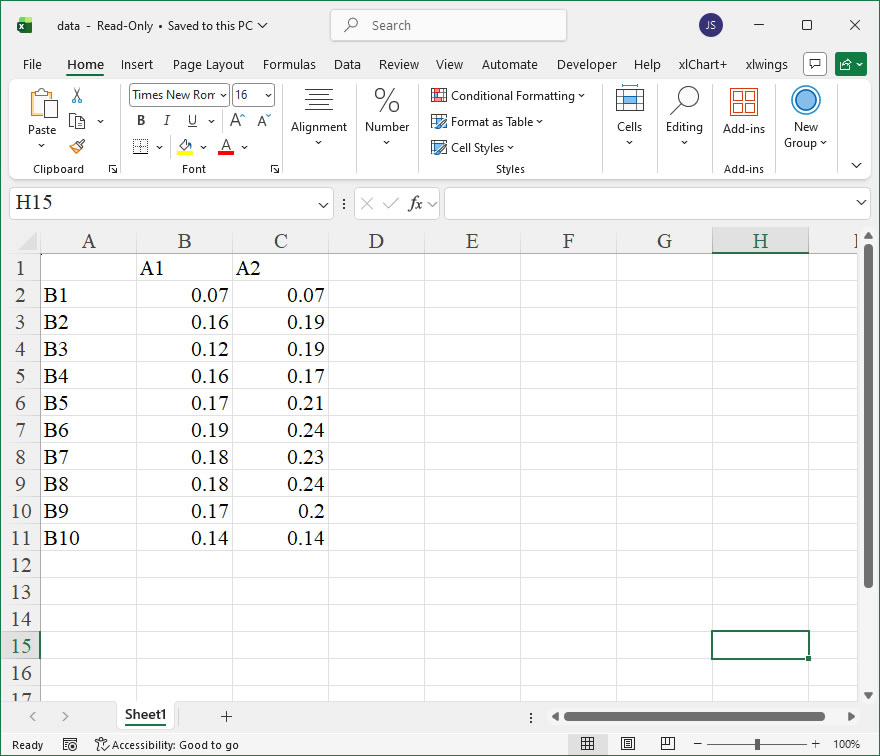
app.api.OnRepeat = ""How To Create Simple Column Chart With Different Colors Using xlwings?
【Example】
【Code】
import xlwings as xw
import os

def set_style(cht):
    cht.ChartArea.Format.Line.Visible=False
    cht.PlotArea.Format.Fill.Visible = False
    cht.PlotArea.Format.Line.Visible = True
    cht.PlotArea.Format.Line.ForeColor.RGB=xw.utils.rgb_to_int((200,200,200))
    #cht.PlotArea.Format.Line.ForeColor.ObjectThemeColor = msoThemeColorText1
    ax1 = cht.Axes(1)
    ax2 = cht.Axes(2)
    ax1.HasTitle = True
    ax1.AxisTitle.Text = 'Categories'
    ax1.AxisTitle.Font.Size = 10
    ax1.TickLabels.Font.Size = 8
    #ax1.TickLabels.NumberFormat = '0.00'
    ax1.HasMajorGridlines = True
    ax2.HasTitle = True
    ax2.AxisTitle.Text = 'Values'
    ax2.AxisTitle.Font.Size = 10
    ax2.TickLabels.Font.Size = 8
    ax2.HasMajorGridlines = True
    cht.HasTitle = True
    #cht.ChartTitle.Caption = 'Plot'
    #cht.ChartTitle.Font.Size = 12

root=os.getcwd()
app=xw.App(visible=True,add_book=False)
wb=app.books.open(root+r'/data.xlsx',read_only=False)
sht=wb.sheets('Sheet1')

sht.api.Range('A2:B9').Select()  #
shp=sht.api.Shapes.AddChart2(-1,xw.constants.ChartType.xlColumnClustered,20,20,350,250,True)
cht=shp.Chart  #
cht.ChartGroups(1).GapWidth=50
cht.SeriesCollection(1).Points(1).Format.Fill.ForeColor.RGB=xw.utils.rgb_to_int((192,0,0))
cht.SeriesCollection(1).Points(2).Format.Fill.ForeColor.RGB=xw.utils.rgb_to_int((255,0,0))
cht.SeriesCollection(1).Points(3).Format.Fill.ForeColor.RGB=xw.utils.rgb_to_int((255,192,0))
cht.SeriesCollection(1).Points(4).Format.Fill.ForeColor.RGB=xw.utils.rgb_to_int((255,255,0))
cht.SeriesCollection(1).Points(5).Format.Fill.ForeColor.RGB=xw.utils.rgb_to_int((146,208,80))
cht.SeriesCollection(1).Points(6).Format.Fill.ForeColor.RGB=xw.utils.rgb_to_int((0,176,0))
cht.SeriesCollection(1).Points(7).Format.Fill.ForeColor.RGB=xw.utils.rgb_to_int((0,176,240))
cht.SeriesCollection(1).Points(8).Format.Fill.ForeColor.RGB=xw.utils.rgb_to_int((0,112,192))

set_style(cht)

cht.Export(root+'/cht.jpg')
cht.Export(root+'/cht.svg')
cht.ExportAsFixedFormat(0,root+'/cht.pdf')

#wb.save()
#app.kill()
How to use Application.OnKey in the xlwings API way
The Application.OnKey member in Excel VBA allows developers to assign macros or specific actions to particular key combinations, effectively creating custom keyboard shortcuts. In xlwings, this functionality is exposed through the Application object’s on_key method, enabling Python scripts to dynamically set or clear these key bindings. This is particularly useful for building interactive Excel-based applications where certain keystrokes need to trigger automated processes, such as data refresh, formatting, or navigation.
Functionality:Application.on_key in xlwings maps key combinations to callable Python functions or clears existing bindings. When the assigned key is pressed in Excel, the linked function executes, allowing for seamless integration of Python logic with user interactions. This can enhance productivity by automating repetitive tasks directly from the keyboard.
Syntax:
In xlwings, the method is accessed via app.api.OnKey, where app is an instance of xlwings.App. The syntax follows:
app.api.OnKey(Key, Procedure)- Key (required): A string specifying the key combination. Use codes like
"^c"for Ctrl+C or"+{F1}"for Shift+F1. For special keys, enclose in braces (e.g.,"{ENTER}"). See the table below for common codes. - Procedure (optional): A string naming the macro to run, or a callable Python function (via
app.macro). If omitted or set to"", the key binding is cleared.
Key Code Examples:
| Combination | Code |
|---|---|
| Ctrl+A | "^a" |
| Alt+F4 | "%{F4}" |
| Shift+Tab | "+{TAB}" |
| Enter | "{ENTER}" |
Example Usage:
Below are xlwings code snippets demonstrating Application.on_key:
- Assign a Python function to Ctrl+Shift+D:
import xlwings as xw

def custom_action():
wb = xw.books.active
wb.sheets[0].range("A1").value = "Shortcut triggered!"

app = xw.apps.active
# Use app.macro to wrap the Python function
app.api.OnKey("^+d", app.macro("custom_action"))
Pressing Ctrl+Shift+D in Excel will write the message to cell A1.
- Clear a key binding:
app.api.OnKey("^+d", "")This removes the shortcut for Ctrl+Shift+D.
- Bind a simple key to an Excel macro:
app.api.OnKey("{F5}", "MyMacro")Assumes “MyMacro” is a VBA macro stored in the workbook. Pressing F5 runs it.